Installation Guide
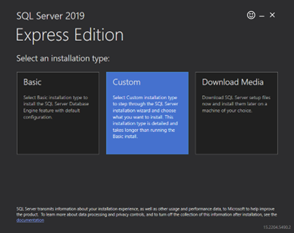
- Launch the SQL Express Installer and select Custom.
- Download to the default location unless requested by the customer due to space limitations. Click next and wait for the install package to download.
- Select “New SQL Server stand-alone installation or add features to an existing installation”
- Agree to the license and click next.
- Turn on “Use Microsoft Update to check for updates (recommended)” and click next.
- If Install Rules comes back with no failed errors, click next. Windows Firewall coming back with a “Warning” is okay and you can ignore this.
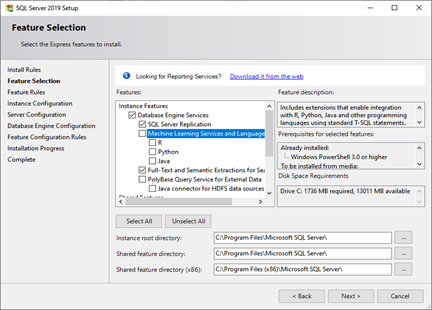
- For Feature Selection make sure you uncheck Machine Learning Services and Language Extensions, this will save a lot of time in the installation process. Click next.
- For Instance Configuration select “Default instance.” Click next.
- For Server Configuration click next.
- For Database Engine Configuration make sure you click on “Mixed Mode (SQL Server authentication and Windows authentication)” and enter a password for the sa account. Typically use the same password for sa and BPConn. Click next.
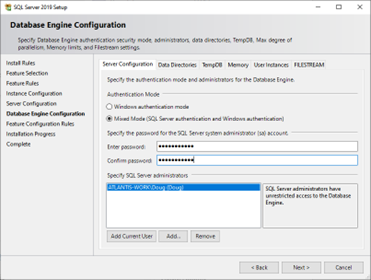
- Make sure to take note of the password used in this step, it will be used again in the BadgePass Server installation.
- Installation complete. Close both the Setup and Installation Center windows.
- Download and run the installer for BadgePass Server from above.
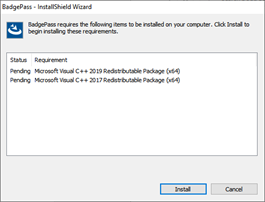
- Install any redistributables and reboot if prompted to do so. Relaunch installer.
- Select Next to start the install.
- Accept the agreement and click Next.
- By default, BadgePass installs to C:\Program Files\. You can click Next unless the customer requests it be installed on a separate drive. The contents of C:\ProgramData\BadgePass cannot be moved.
- Select “Server authentication using BPConn Login ID” and click next.
- The following defaults can be left alone in most cases:
o BadgePass Server – Account Type: Local System
o BadgePass Access Manager Server – Account Type: Local System
o BadgePass Event Server – Account Type: Local System
o BadgePass Front End Server – Account Type: Local System
o BadgePass Agent Server – Account Type: Local System
o BadgePass Client Server Run As Account – Account Type: Local System
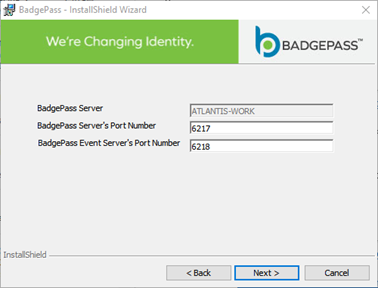
- BadgePass Server will automatically be set to the name of the current machine. Server Port should be set to 6217 and Event Server Port should be set to 6218. Click Next.
- Select the down arrow or “Browse…” in the Database server section and select (local)
- Select Connect using “SQL authentication using a Login ID” and type in the sa password that you set during the SQL 2019 Server part. Select Next.
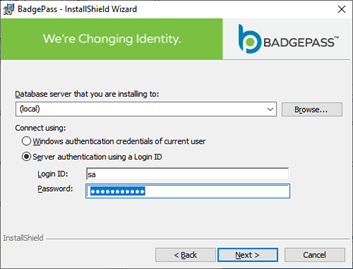
Note: You may see the database field empty here or get Error 27502. Refer to the download link for the error on page 1. You will need to leave this part of the install and return to it (Back and then Next should resolve it, if not then restart the installation completely).
- Select Next again when you arrive to the BPConn Password and (confirm) section. The default values do not need to be changed.
- Click Install to begin the installation.
- If this shows a failed message, go to C:\ProgramData\ and rename the BadgePass folder to something like BadgePass.old and start the install again. Make sure that you didn’t have a typo for the login ID password on the authentication and database screen.
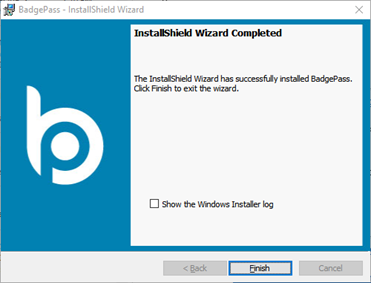
- BadgePass is now successfully installed.
- Run the installer and select Install Reporting Services
- Select “Express” as the free edition and click next.
- Accept the terms and click next.
- Select next when it asks about having a Database Engine instance on the server.
- Select Install with the default location.
- Click on Configure report server.
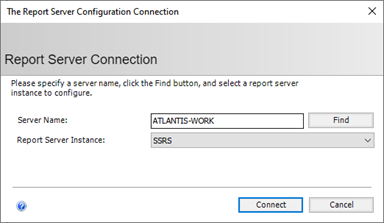
- Make sure that the Server Name matches the current machine and select connect.
- Select Web Service URL and click Apply. The address listed under URLs will be the location of the Report Server.
- Select Database on the left side and click Change Database.
- Action: Create a new report server database and click next.
- Database Server:
o Server Name should match the name of the current machine.
o Authentication Type should be set to SQL Server Account.
o Type sa for the username and the password that you set up in the SQL 2019 Express section.
o Select Test Connection, it should say “Test Connection Succeeded.” Click OK and then next to proceed.
- Database Name: You can leave everything set at default here and click next.
- Credentials: You can leave these settings as default as well and click next.
- Summary: Click next.
- Progress and Finish: Once everything is done, select Finish.
- Select Web Portal URL on the left side and click Apply. The URL listed here is what will be used by anyone on site that wants to access the reports.

- You can now exit out of the Report Server Configuration Manager.
- Search Windows for a newly installed folder called Microsoft SQL Server 2019 and launch the application “SQL Server 2019 Configuration Manager”
- On the left side, expand SQL Server Network Configuration and click on “Protocols for MSSQLSERVER”
- Double click on Named Pipes and TCP/IP and set Enabled to “Yes”
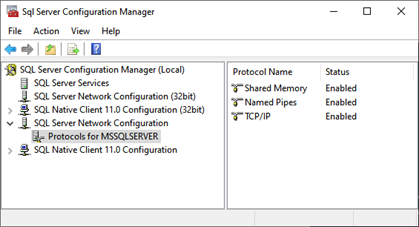
- Now select SQL Server Services on the left side and right-click on SQL Server (MSSQLServer) and select Restart.
- Close SQL Server Configuration Manager.
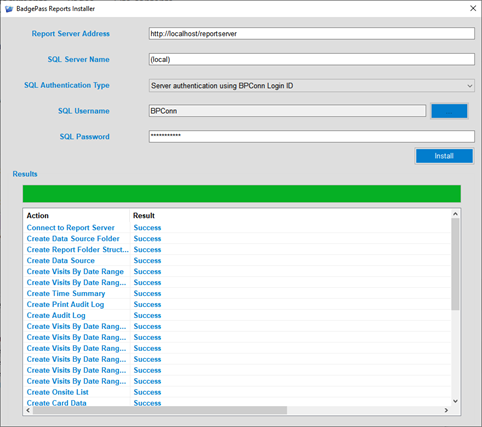
- Right click and launch the BadgePass Reports installer as an administrator.
- Following the previous steps in this guide, you should only need to type in the BPConn Password.
- Select Install. It can take a little bit, but you should see Success listed in all fields.
- Launch Microsoft Edge and navigate the web URL that is listed in Report Server Configuration Manager. It should be http://[servername]/reports.
- If it loads successfully, you should be presented with the following screen:
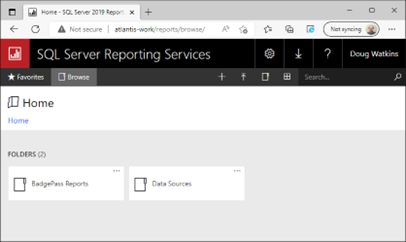
-
We will need to assign users to 2
locations. Start by selecting the cog at the top of the screen:

- Select Security.
- Select Add group or user
- Type in their domain name followed by their login name. This can be found on a user machine by opening command prompt and typing “whoami” and copying the contents of the output. It should look like this:

- Select System User and click OK. Repeat for each user that will be accessing the reports.
- Click on the top of the screen where it says SQL Server Reporting Services to return to the landing page.
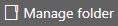
- Now select the Manage Folder button below the Settings cog.
- We are going to repeat the steps used to create a “group or user” as above and this time specify a role. The Browser role should be enough for most users, but advanced users may want additional roles assigned.
- Users should now be able to navigate to this page if you give them the reports link from their own PCs without having to connect to the server.